Difference between revisions of "Overview of Test parameters"
Shawn Imming (Talk | contribs) |
|||
| Line 23: | Line 23: | ||
== Spezific test designs == | == Spezific test designs == | ||
| − | + | == Hyperbolic Performance Test (incremental stress test) == | |
| − | + | [[File:5.PNG|thumb|Protocol hyperbolic stress test]] | |
| + | [[File:Practice SRM Ergometer - Test2.jpg|thumb|Hyperbolice stress test]] | ||
| − | The [[Media: | + | You can see two examples of an incremental hyperbolic stress test on the right hand side. The first image shows you the protocol which was programmed under the ''[[Media:Workouts.png|Workouts tab]]'' before starting the stress test. This particular one starts at 80W over 3 min and will be increased by 20 W every 3 min. |
| + | |||
| + | The second image shows you the data and guidelines during the incremental hyperbolic stress test. | ||
*The current power is shown green colored | *The current power is shown green colored | ||
*The current heartrate is shown red colored | *The current heartrate is shown red colored | ||
*The current cadence is shown blue colored | *The current cadence is shown blue colored | ||
| + | *The current torque is shown yellow colored | ||
*The current speed is shown pink colored | *The current speed is shown pink colored | ||
| − | *The | + | *The same colors are being used for the lines in the ''[[Media:Monitor image.png|monitor image]]''. |
*The graphic scaling adjusts automatically to the produced power. | *The graphic scaling adjusts automatically to the produced power. | ||
| − | * Under '' | + | * Under ''[[Media:Time.png|Time]]'' you can see the ridden time so far |
| − | * Under '' | + | * Under ''[[Media:Time step.png|Time to next step]]'' you can see the remaining time until proceeding to the next step |
| − | *The colored bars in the upper right area have the following function: | + | *The ''[[Media:Colored bars.png|colored bars]]'' in the upper right area have the following function: |
:At 90 to 100 % completion of the cadence guideline, the bar stays green. At 80 to 90 % completion the bar turns yellow and at 70 to 80 % it turns red. There is no display of larger deviations. | :At 90 to 100 % completion of the cadence guideline, the bar stays green. At 80 to 90 % completion the bar turns yellow and at 70 to 80 % it turns red. There is no display of larger deviations. | ||
The intermediate status display has the following functions: | The intermediate status display has the following functions: | ||
| − | * | + | *The name of the ''[[Media:File name.png|File]]''. |
| − | *Showing after which [[Media: | + | *The amount of time with the associated power and cadence you want to ''[[Media:Add.png|add]]'' to the test. |
| − | + | *Showing after which ''[[Media:Control by.png|guideline]]'' you train at the moment: ''Control by Idle'', ''Control by Power'' or ''Control by Cadence''. | |
| − | + | ||
| − | + | ||
| − | * | + | *''No Brake'' or ''[[Media:Brake.png|Brake on]]'' works only in combination with an Ergometer. |
| − | *If you are done with the test | + | *''[[Media:Start-Pause.png|Start]]'', ''Pause'' or ''Resume'' to start, pause or resume the test. |
| − | + | *If you are done with the test you can end the test and leave the online program by clicking on ''[[Media:Stop.png|Stop]]''. | |
| − | *''Stop Ergo'' works only in connection with the Ergometer and if there will be no cadence | + | *By ''[[Media:Step.png|clicking]]'' on ''Prev. Step'' / ''Next Step'' you can, depending on what you have adjusted at the ''Predefined File'' level, go back to the previous step / marker or jump forward to the next step / marker. |
| − | + | *''[[Media:Stop ergo.png|Stop Ergo]]'' works only in connection with the Ergometer and if there will be no cadence. | |
| − | + | == Isokinetic Performance Test == | |
| − | + | ||
| − | + | During modern races, the ability to deliver high power outputs for a short period of time is crucial. By example in a brake away, on climbs or in a final sprint. To evaluate functional power output it is possible to develop a isokinetic performance test whereby the cadence is controlled while the cyclist delivers power at free will. | |
| − | + | <gallery> | |
| − | + | File:Iso.PNG|Isokinetic Performance Test | |
| − | + | </gallery> | |
| − | + | == A combination of the Hyperbolic and the Isokinetic Performance Test == | |
| + | For professional users it will be interesting combining the hyperbolic and the isokinetic mode as it is possible to simulate realistic outdoor training situations with the Ergometer. | ||
| − | + | *In the monitor image the steps of the hyperbolic mode are displayed in green and isokinetic in grey. | |
<gallery> | <gallery> | ||
File:Practice SRM Ergometer_Combination_Hyperbolic-Isokinetic.jpg|Combination Hyperbolic & Isokinetic Mode | File:Practice SRM Ergometer_Combination_Hyperbolic-Isokinetic.jpg|Combination Hyperbolic & Isokinetic Mode | ||
| − | + | </gallery> | |
Latest revision as of 08:17, 16 March 2017
Test - Start

Test

Test - End


.jpg)
Contents
Start and Stop performance diagnostics
BRAKE ON: The brake is active and the client can pedaling with resistance
BRAKE OFF: The brake is deactivate and the client can continue pedaling without resistance and cool down – continuous recording of the heart rate
(No Brake or Brake on only works in combination with the Ergometer)
START: Start by beginning to pedal or pushing the Start Button (Check the values displayed on the computer screen)
STOP: Finish the test
PAUSE: Interrupt the test
NEXT STEP: Go to the next step of the test
LAST STEP: Go to the last step of the test
STOP ERGO: Stop the ergo immediately (it only works without cadence)
Next steps
- Comment: Entry file name then press Save
- Recommended cool – down - protocol with lower workload
- Clean the ergometer (!)
Spezific test designs
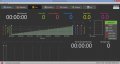
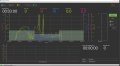
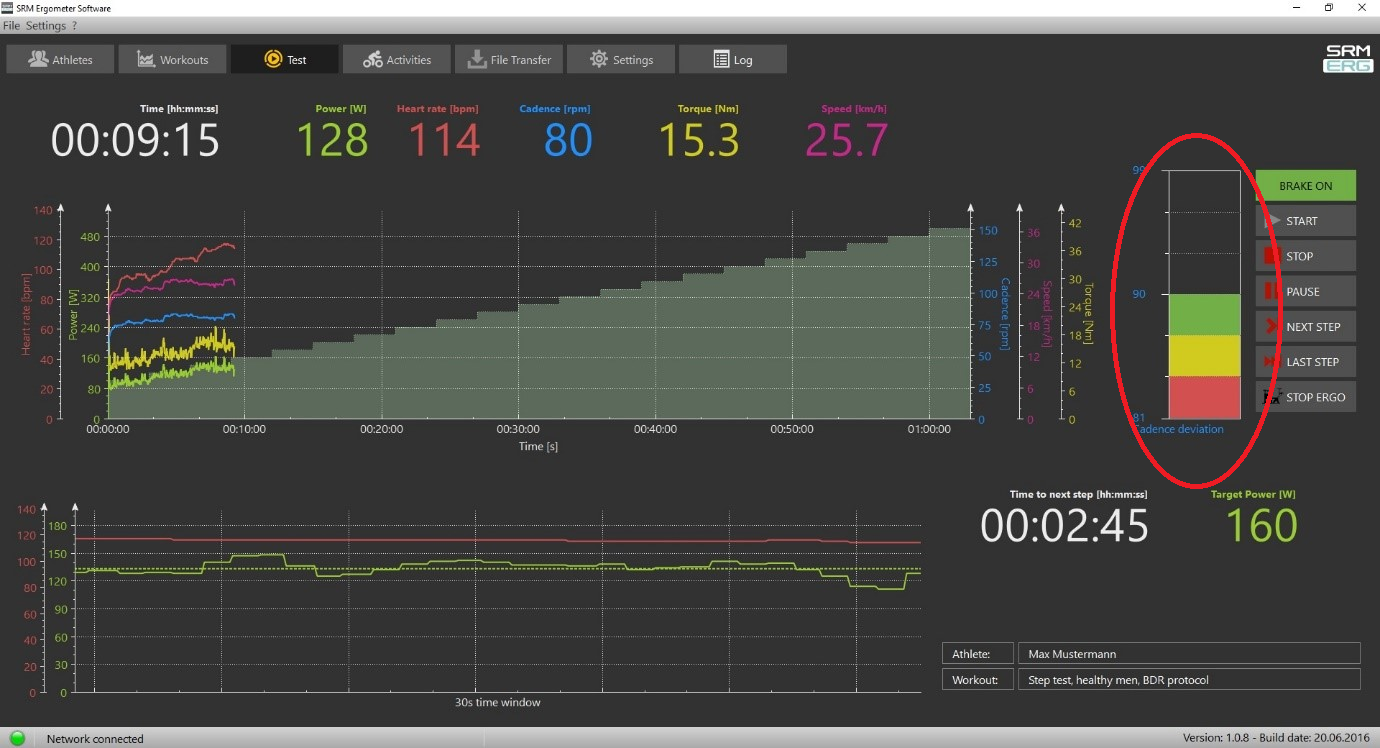
Hyperbolic Performance Test (incremental stress test)

You can see two examples of an incremental hyperbolic stress test on the right hand side. The first image shows you the protocol which was programmed under the Workouts tab before starting the stress test. This particular one starts at 80W over 3 min and will be increased by 20 W every 3 min.
The second image shows you the data and guidelines during the incremental hyperbolic stress test.
- The current power is shown green colored
- The current heartrate is shown red colored
- The current cadence is shown blue colored
- The current torque is shown yellow colored
- The current speed is shown pink colored
- The same colors are being used for the lines in the monitor image.
- The graphic scaling adjusts automatically to the produced power.
- Under Time you can see the ridden time so far
- Under Time to next step you can see the remaining time until proceeding to the next step
- The colored bars in the upper right area have the following function:
- At 90 to 100 % completion of the cadence guideline, the bar stays green. At 80 to 90 % completion the bar turns yellow and at 70 to 80 % it turns red. There is no display of larger deviations.
The intermediate status display has the following functions:
- The name of the File.
- The amount of time with the associated power and cadence you want to add to the test.
- Showing after which guideline you train at the moment: Control by Idle, Control by Power or Control by Cadence.
- No Brake or Brake on works only in combination with an Ergometer.
- Start, Pause or Resume to start, pause or resume the test.
- If you are done with the test you can end the test and leave the online program by clicking on Stop.
- By clicking on Prev. Step / Next Step you can, depending on what you have adjusted at the Predefined File level, go back to the previous step / marker or jump forward to the next step / marker.
- Stop Ergo works only in connection with the Ergometer and if there will be no cadence.
Isokinetic Performance Test
During modern races, the ability to deliver high power outputs for a short period of time is crucial. By example in a brake away, on climbs or in a final sprint. To evaluate functional power output it is possible to develop a isokinetic performance test whereby the cadence is controlled while the cyclist delivers power at free will.

Isokinetic Performance Test

A combination of the Hyperbolic and the Isokinetic Performance Test
For professional users it will be interesting combining the hyperbolic and the isokinetic mode as it is possible to simulate realistic outdoor training situations with the Ergometer.
- In the monitor image the steps of the hyperbolic mode are displayed in green and isokinetic in grey.
Combination Hyperbolic & Isokinetic Mode
